Appearance
客户端
客户端核心作用
显性客户端:需手动下载 / 部署(如本文的 gostc);
隐性客户端:已内置到路由器、NAS、软件系统等设备中,无需单独下载,但底层逻辑一致。
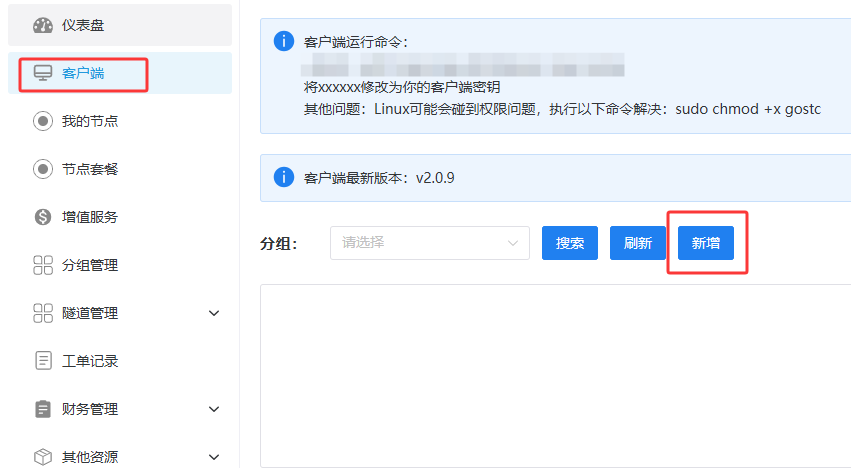
1. 创建客户端(管理后台操作)
① 登录后台:https://gostc.caiyunup.top/login,
② 左侧导航栏选择「客户端」→「新增」;
③ 输入自定义客户端名称(便于区分多设备),点击「保存」。
2. 获取客户端密钥(核心凭证)
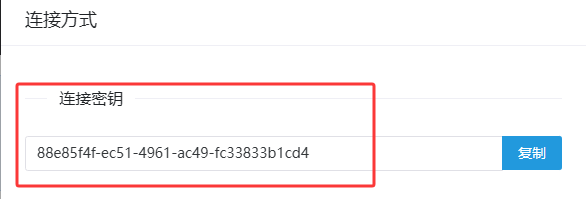
① 找到已创建的客户端,点击「连接方式」;
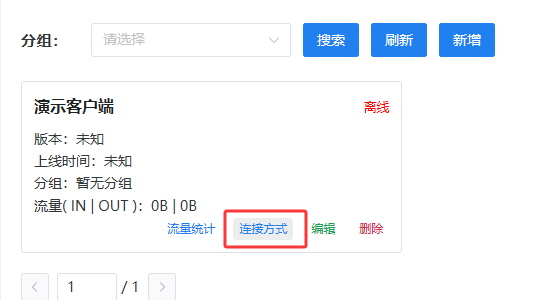
② 在弹出页面中复制密钥(后续运行客户端需用到,请勿泄露)。
3. 运行客户端(2 种方式,推荐 Docker)
运行方式有两种:Docker运行、二进制文件运行
方式 1、Docker 运行 (跨平台通用,推荐)
可以直接运行客户端容器,或者使用docker compose运行,推荐docker compose 镜像拉取(若拉取失败,手动下载:gostc.tar)。
shell
# 方式 1:单容器快速运行(替换******为实际密钥)
docker run -d --name gostc --net host --restart always sianhh/gostc:latest -key ******
yml
# 方式 2:Docker Compose(更易维护,创建docker-compose.yml文件)
services:
  gostc:
    image: sianhh/gostc:latest
    restart: always
    network_mode: host
    container_name: gostc
    command:
     - --tls=true
     - -addr
     - gostc.caiyunup.top # 服务端地址(固定)
     - -key
     - ******   # 这里需要把******修改为客户端密钥
方式2、二进制运行文件(适配特定系统)
根据当前运行的系统架构,下载对应的文件并解压,得到gostc可执行文件
| 系统 / 设备 | 下载包名 | 备注 |
|---|---|---|
| Windows (64 位) | windows_amd64.zip | 解压后得到 gostc.exe |
| Linux (64 位) | linux_amd64.tar.gz | 解压后得到 gostc 可执行文件 |
| Android | android.apk | 带 WebUI控制台,直接安装 |
| OpenWRT | gostc.run | 带 WebUI控制台,直接安装 |
▶ Windows 系统
shell
# 临时运行(关闭窗口即停止)
gostc.exe --tls=true -addr gostc.caiyunup.top -key ******
shell
# 注册为系统服务(推荐,开机自启,后台运行)
gostc.exe install --tls=true -addr gostc.caiyunup.top -key ******
gostc.exe start # 启动服务
shell
# # 系统服务管理命令
gostc.exe start # 启动
gostc.exe stop # 启动
gostc.exe uninstall # 卸载,卸载后需要重新注册为系统服务
▶ Linux 系统
shell
# 赋予执行权限(首次运行)
chmod +x gostc

# 临时运行(关闭窗口即停止)
./gostc --tls=true -addr gostc.caiyuup.top -key ******
shell
# 注册为系统服务(推荐,开机自启)
./gostc install --tls=true -addr gostc.caiyuup.top -key ******
shell
# 系统服务管理命令(默认安装路径:/usr/local/bin/gostc)
/usr/local/bin/gostc start # 启动服务
/usr/local/bin/gostc stop # 停止服务
/usr/local/bin/gostc uninstall # 卸载服务,卸载后需要重新运行安装命令
/usr/local/bin/ 为gostc安装目录
****** 是创建客户端时获取到的客户端的密钥
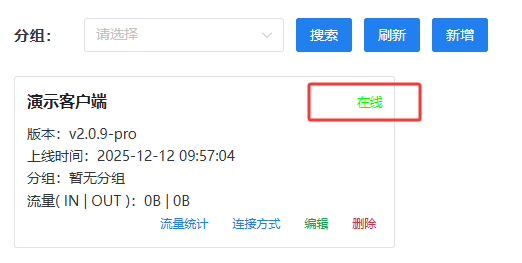
4. 启动成功
① 客户端本地验证:无报错提示、进程 / 容器运行正常;
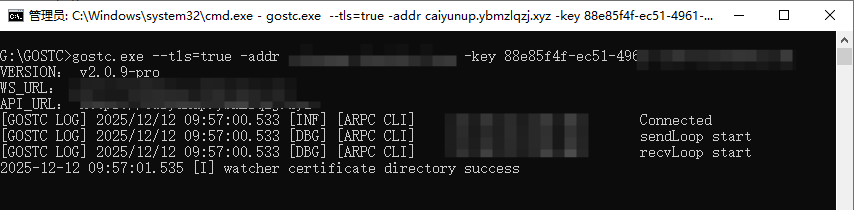
② 管理后台验证:对应客户端状态显示「在线」(核心验证依据)。